Posts

Holographic and Metallic Nail Powder

Image
  For Christmas Xander gave me this set of nail powders. There are several chrome/metallic colors, holographic colors, and a couple pearl colors. One of the pearl colors actually says it’s a mermaid color! 🧜🏻‍♀️ 😍 I really like them and I’m so excited to try them!

Christmas Nails

Image
  This year for Christmas Lydia and I searched Pinterest for some ideas. We came across some cute ones with Santa. She loved them and I did my best. On her thumb I painted the Santa.  For the Santa’s face I used a light pink/peach color and painted her whole thumb nail with it. Cured it with the light, then painted the red sparkles. Cured it, then used the nail tools and put “dots” across the red line, and the tip of her nail (for his beard). Cured it then used the nail tools to put black dots for the eyes and a light orange for his nose. Then cured them. I painted her pointer fingers with green sparkles, her pinky’s with red sparkles, her middle fingers red, and her ring fingers white with then black for the light strings and bright colors for the lights. I put the glossy top coat on all of her fingers except her middle fingers. I put the matte top coat on them. I think they turned out really cute!

Chicken Hoagies

Image
  This is a recipe from Nick's mom.  I'm not sure how long they have been making it, but it was before I married Nick. I make it different than they do.  They use un-breaded chicken tenders, but I have a hard time biting into them (it's a texture thing) so I use the canned chicken and shred it.  There are so many different ways you could make these... Chicken Hoagies Ingredients: 1 10oz. Can Chicken (you could use the 12oz. can as well) 3 cups Shredded Cheese 1 tbsp Onion Powder 1/2 tbsp Paprika Powder Pinch of Pepper 1 tsp Salt Hoagies or French Bread Directions: Heat oven to 375°. Butter both sides of the bread and place on a baking sheet (I lined the baking sheet with aluminum foil for easy clean-up).  Once the oven is ready, place the bread in the oven for about 5 minutes to toast it.  While the bread is toasting, combine the chicken, 2 cups of cheese, and spices in a bowl. Remove the bread from the oven. Be careful not to burn yourself and place the mi...

Halloween Lunches

Image
  I am making my kids Halloween lunches again this year.  Last year we started making our kids  Home School Lunches .  Last year for Halloween I made them  Fun Halloween Lunches .  This year they have new lunchboxes and we can add more to them.  Here is one of the lunches I made this year for fun Halloween.

Halloween Nails

Image
  Today I painted my nails for Halloween. I know they won’t last until Halloween, but I like for them to be themed for the whole month. I didn’t do much this time. I just wanted them to be simple. So I painted my thumbs black, my ring fingers gray, Andy other fingers plum. Then I put some black nail jewels on my ring fingers. Then I painted the glossy top coat on my thumbs and then matte on my fingers. They are simple, but I really like them!

Sourdough Pumpkin Chocolate Chip Cookies

Image
  I have had my  Sourdough Starter  for almost 2 years now! About a year ago I started putting it in a lot of recipes, but especially dessert recipes. I looked up some sourdough pumpkin recipes and adjusted them for me. So here is my recipe for them. I do have to add more flour being at a high altitude. If you are not, you won’t need as much flour. Sourdough Pumpkin Chocolate Chip Cookies Ingredients: 1/2 cup Salted Butter 1 tbsp Pumpkin Spice 1/4 cup Sugar 1/2 cup Dark Brown Sugar 1/3 cup Pumpkin Purée 1 tsp Vanilla 1/2 cup Sourdough Starter (fed or unfed) 2 cups Flour 1/4 tsp Baking Soda 1/4 tsp Baking Powder 1/2 tsp Salt 1/2 cup Mini Chocolate Chips Directions: Preheat oven to 375°. In a small saucepan brown the butter stirring frequently. It takes about 5 minutes over medium heat and will have a nutty aroma. Remove from heat and stir in the pumpkin spice. Set aside to cool (under 100°). While it’s cooling, in a large mixing bowl; mix the sugar, brown sugar, pumpkin, v...

Fall / Autumn Nails

Image
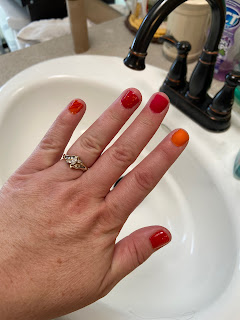
  I repainted my nails today. They didn’t last as long as they have been, but that could be because I was in a hurry last time and didn’t do my best. This time I just used orange and red. I mixed these two colors on my thumbs and then painted my pointer fingers and pinkie orange and my middle and ring fingers red. I put orange dots on my ring fingers and red lines on my pinkie’s with this Nail Tool . Then for the top coat I used the regular gloss on my thumbs, ring fingers, and pinkies; and the matte finish on my pointer and middle fingers.